
Glass engraving is the method in carving phrases or designing the glass item via way of means of the use of an electrical wood. It is an artwork from in order to take exercise to master. Doing this aspect calls for skill, staying power and additionally simply the proper quantity of the stress in developing the layout with out shattering the glass. The end result is that you may get the honestly stunning layout in order to flip the obvious piece of your glass into the paintings of artwork. Almost each form of layout may be carved into the glass, with the roses which might be being famous layout to choose. Here are a few clean steps in engraving a rose in your glass. Read the subsequent facts below.
For step one you have to find the photograph of a rose in order to be used as a template. The coloring books of youngsters can be the remarkable locations in locating pictures. After that, you want to print the photo out onto the piece of simple paper. If the photo of rose is a published photograph, you may virtually make a replica of it, or test it into your pc earlier than you will print it.
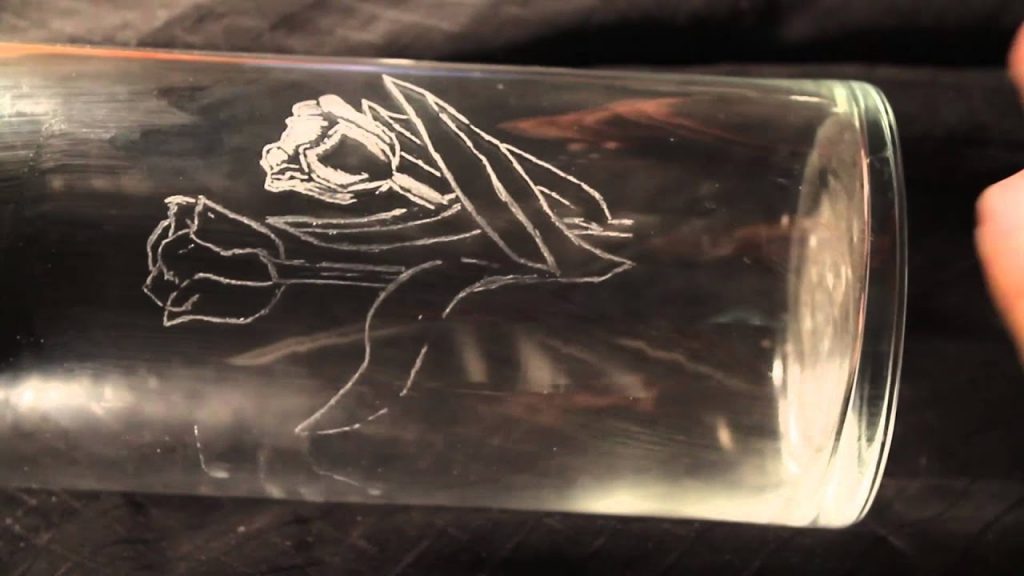
For the second one step, you need to reduce out the rose layout via way of means of the use of the scissors from the paper. The rose layout does now no longer want to be reduce out perfectly. After that, connect the photograph to the bottom or interior a chunk of the glass via way of means of the use of the tape. If engraving a easy piece of the glass, you may connect it to the bottom. If you will engrave the curved floor much like a wine glass, you need to region your photograph at the interior of your glass.
After that, clean the flat floor on which in appearing the engraving. Ensure that there’s good enough lighting fixtures nearby. Then, lay a chunk of the black material over the floor. Its black shadeation will make the sensitive glass etching stand out more.
For the subsequent step, insert the small diamond bit into your glass engraver. Plug the engraver into the electric socket after which flip it on. Place the engraver tip onto the outer fringe of your rose layout and lightly drag it alongside the lines. You can begin at each segment which you are desired, however recollect to now no longer carry the engraver till you attain the intersection of the 2 lines.
For the closing step, you need to preserve etching till the rose sample has been transferred for your glass. Then, wipe your glass floor with the damp towel with the intention to get rid of all strains of dust.